Why Use an Image Hosting Service (Why)
In previous projects, I usually stored images directly inside the project's file structure and committed them to GitHub together with the source code. This approach works fine when the number of images is small and image quality is not a major concern.
However, things are different with the Gallery section introduced in this blog:
- The number of images increases significantly
- Individual image files are relatively large
- Images are mainly used for frontend display rather than as code assets
If all images were still stored directly in the GitHub repository, the repository size would grow rapidly, making maintenance and loading performance worse. In this scenario, using a dedicated image hosting service becomes a much more reasonable solution.
Choosing an Image Hosting Solution
Before settling on a solution, I looked into several common image hosting options. Since this is a personal blog, my main considerations were cost control and ease of use, and the expected traffic volume is not extreme.
Based on these factors, I mainly compared AWS S3 and Cloudflare R2, and eventually chose Cloudflare R2.
The main reasons are:
- Provides a certain amount of free storage (currently 10 GB)
- No egress fee (no charge for outbound traffic)
- Native compatibility with the S3 API
- Supports direct Public URLs, making frontend usage simple
- Works naturally with Cloudflare CDN and Workers, offering good extensibility
For personal blogs or small-to-medium image hosting scenarios, R2 offers a very solid balance between cost and usability.
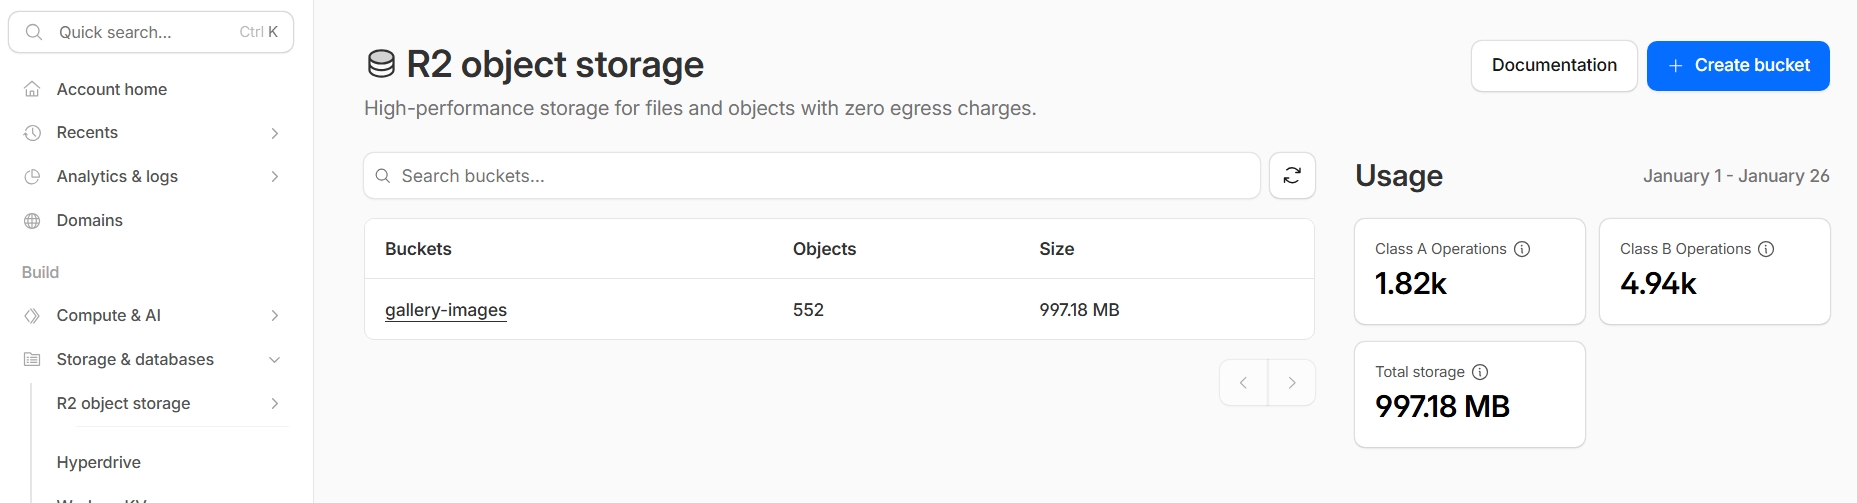
Creating a Cloudflare R2 Bucket
If you already have a Cloudflare account and have enabled the R2 service, you can continue directly.
If not, you will need to register a Cloudflare account first. Note that enabling R2 requires a payment method to be linked.
After entering the Cloudflare Dashboard, navigate through:
Build ➡ Storage & databases ➡ R2 object storage ➡ Overview
On the Overview page, click Create Bucket to create a new bucket.
Bucket naming is entirely up to you; I usually name buckets based on the project or usage.

Organizing Images with Prefixes
After creating a bucket, you can enter the bucket page and create prefixes.
Clicking Add directory in the UI allows you to create a new prefix.
It's important to note that:
In R2, a prefix is not a real folder. It is simply a key prefix used to logically organize objects.
Cloudflare presents prefixes as folder-like structures in the UI for better readability and management.
How you design your prefix structure depends entirely on how you want to organize your project's images.
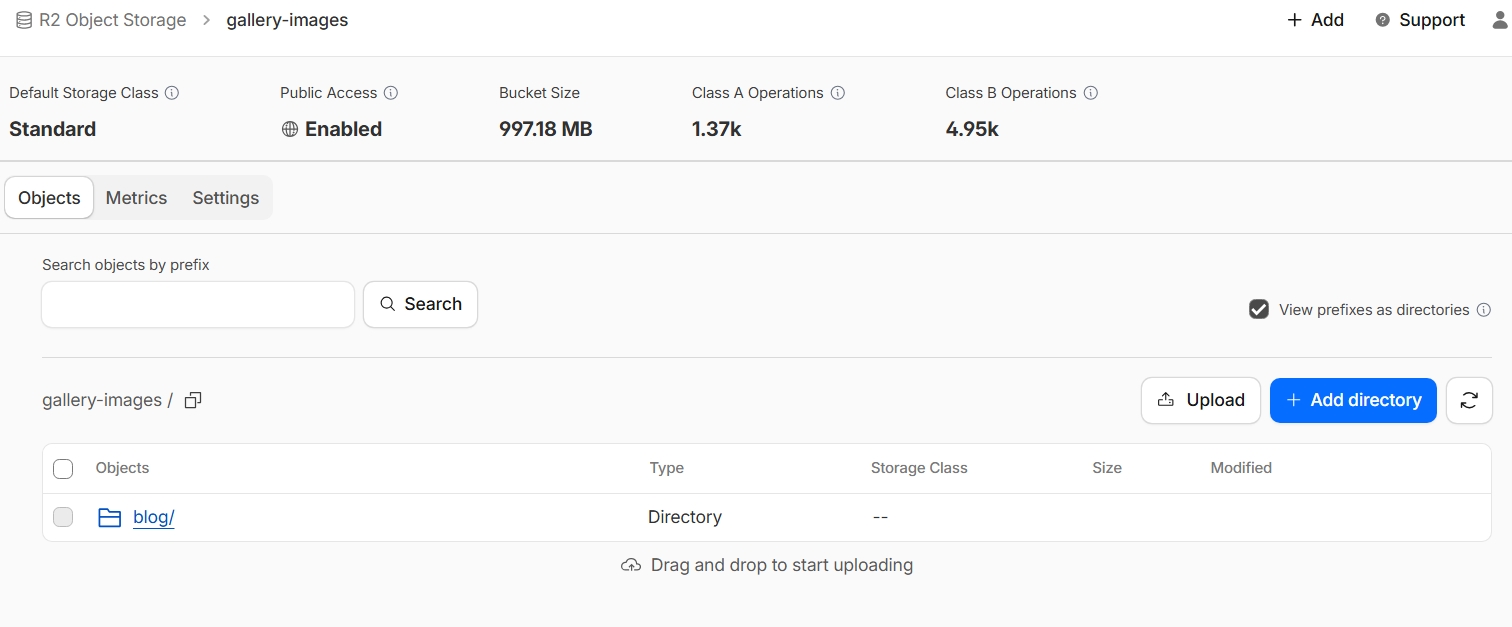
Image Upload Methods
Cloudflare R2 supports multiple ways to upload images. Common options include:
- Uploading directly via the Cloudflare Dashboard (suitable for a small number of files)
- Using third-party tools such as PicGo or PicList via the S3 API (recommended for image hosting use cases)
- Uploading in batches using code or scripts with an S3 SDK
In this setup, I chose to upload images directly through the dashboard. The Gallery does not yet contain a very large number of images, and many of the photos are stored on my phone. Logging into Cloudflare on mobile and uploading images directly turned out to be the most convenient approach.
I plan to experiment with S3 API–based and automated upload methods later and will share those experiences in a future post.
Image Access (Using a Custom Domain)
Once the images are uploaded, the next step is using them in your code.
In my case, I chose to bind a custom domain. In the bucket's Settings, click Connect Domain and bind a domain that has already been configured in Cloudflare, for example: img.yourdomain.com.
After binding, image URLs can be accessed uniformly as:
https://img.yourdomain.com/image.jpg
This makes frontend usage very straightforward and also simplifies future migration or adjustments.
R2 also supports programmatic management via the S3 API, which is mainly used for uploading and access control. For frontend image display, however, using direct URLs is still the recommended approach for simplicity and security.
Summary
This post documents my practical experience using Cloudflare R2 as the image hosting solution for the Gallery section of this blog. From bucket creation and image organization to uploading and frontend usage, R2 has performed very well in terms of usability and cost control.
In future posts related to the Gallery, I plan to cover topics such as image compression, size parameters, and loading performance optimizations.